What is an Amazon Brand Store? How to create your own Amazon shop

Especially on Amazon, it is difficult to conduct proper branding and create brand recognition. Although A+ Content allows for individual customization of product detail pages, its impact on branding is rather limited. Therefore, the online giant gives sellers of registered brands the opportunity to set up their own Brand Store on Amazon and essentially open a “shop within a shop.”
Thanks to the helpful tools and templates, you don’t even need extraordinary design skills to set up a professional store. How to create your Amazon Brand Store and what to consider while doing so can be read here.
What is an Amazon Brand Store?
Brand owners are given the opportunity to create their own brand shop. According to your own ideas, you can set up a store where you consciously showcase your brand and your products.
In this example, the Apple Brand Store on Amazon can be seen:
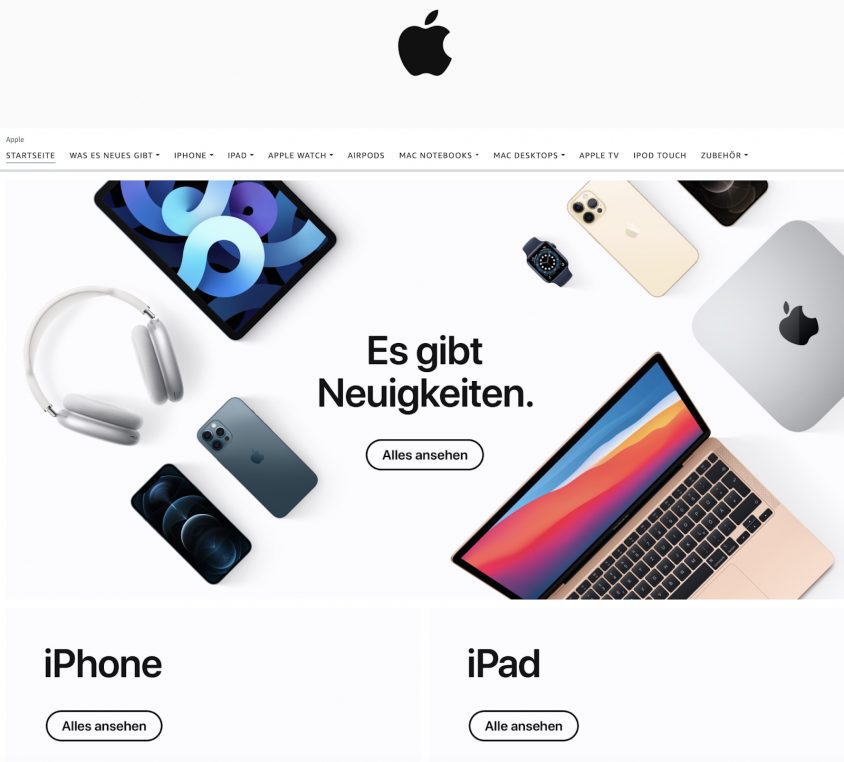
Through the large Apple logo in the header, the customer immediately recognizes which brand it is and can jump to the various product categories in the navigation bar to find the desired products. The most popular products are also prominently placed on the homepage. An Amazon Brand Store is essentially your own little online shop on the marketplace.
Another advantage: There are no distractions from competing products. While the product detail page in the familiar Amazon environment may also show ads from competing campaigns, the Amazon Brand Store belongs solely to you. No comparable offers from competitors are listed there.
Attention: First, register your brand in the Amazon Brand Registry. Only once this process is completed can you open a storefront on Amazon. How to proceed to register your brand can be found here: How to Benefit from Amazon Brand Registration.
How do I create an Amazon Brand Store?
As a brand owner, you can create your own Brand Store on Amazon for free. To do this, log in to Seller Central and select the “Stores” section from the dropdown menu. Finally, click on “Manage Stores.”
Now you can create the Amazon Brand Store. First, you need to provide some information. This includes the brand name and a brand logo. Then choose whether you want to use the standard version with normal-sized product images or prefer the “Tall” product grid, which allows for large item photos. The latter is especially suitable for products with many details that need to be clearly visible.
Additionally, a header is created that will be displayed at the top of your storefront. It consists of an image, the brand logo, and the navigation bar that will guide through your pages. With different pages, you can represent different product categories, for example:

The brand Philips Avent offers a wide range of baby products – from baby monitors to baby bottles to pacifiers. If the customer clicks on the category Baby Monitors in this Amazon Brand Store, they will receive an overview of the various offers – from the affordable entry-level model to the high-tech device for a whopping €220.
This division into different pages makes it easier for customers to keep track and thus improves the shopping experience. If all of Avent’s products were displayed directly on the first page, the selection would simply be overwhelming and, above all, confusing. After all, someone looking for a pacifier does not want to have to wade through an army of bottles and baby monitors first.
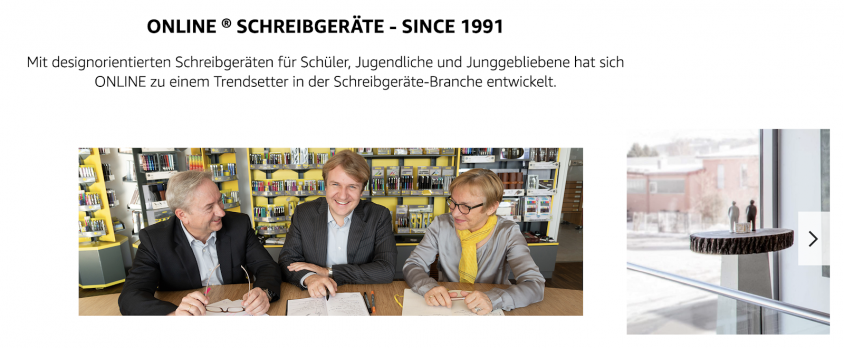
The stationery manufacturer ONLINE goes even further and has added subpages in addition to the main pages:
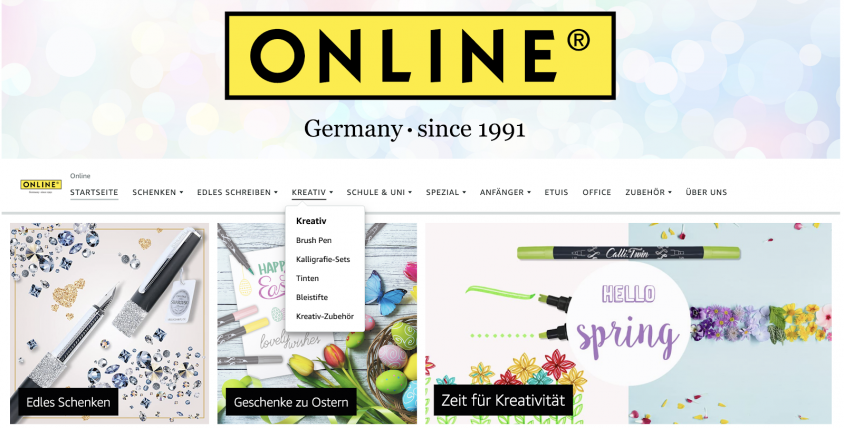
The selection of writing tools is probably much larger than that of baby accessories. On the main page “Creative,” there are subpages like “Brush Pen” and “Calligraphy Sets.” On these subpages, the products can be found.
As with Avent, the division into pages and subpages serves to provide clarity, allowing customers to quickly and easily find the products they are looking for and have a good shopping experience.
Once you have established a structure, you can easily create it using pre-made templates and edit it via drag & drop. In addition to texts, you can also use videos and images to tell your story. This way, you can even showcase your products in action.
Building the Amazon Brand Store: Templates
Some online sellers do not create an Amazon shop because they believe the setup is difficult. The opposite is true: To design your own store, Amazon provides you with three templates that allow you to quickly and easily create a professional page. The content of the templates can be customized as desired. Individual tiles within the templates can be moved, removed, or newly added. However, those who prefer to design their page themselves can also use a blank template and fill it with elements such as images, products, or texts.
Since the templates serve different purposes, you should decide in advance what you want to achieve with a page. Do you want to provide an overview or showcase many individual products? So first determine what the intention of the page should be, and then choose the template that best reflects this.
Marquee (Entry)
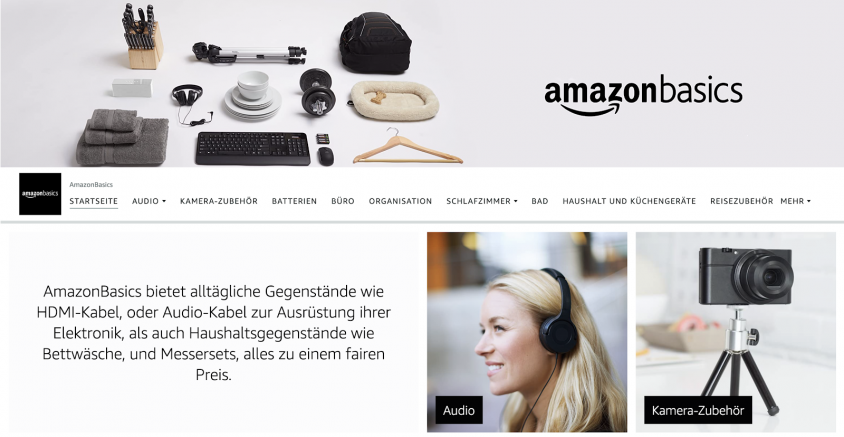
This template is designed as an entry page. There is space for texts and images that illustrate your offering. Short texts that describe the purpose of the page are suitable for this. You can use this template, for example, as a homepage to roughly present your offering, as done in the Amazon Basics Brand Store:
Showcase (Product Presentation)
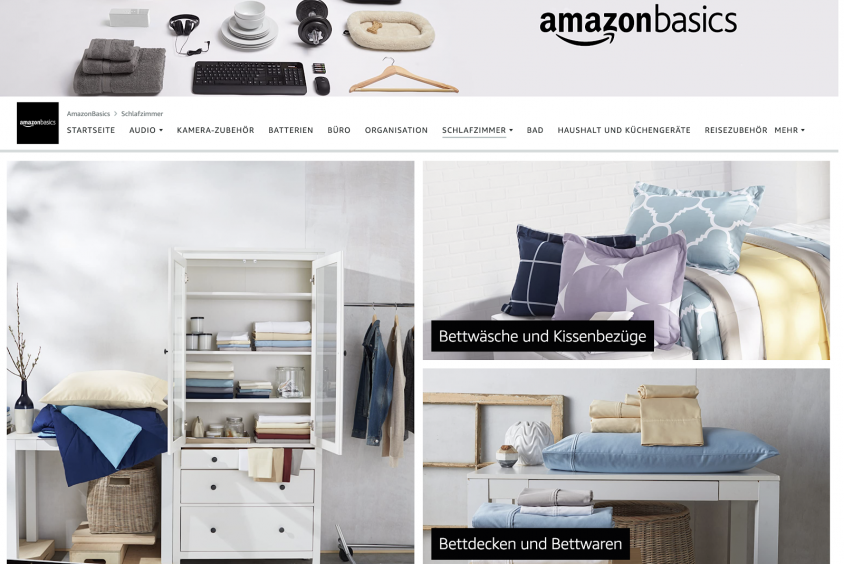
Here, the focus is on the presentation of the products and the associated content. With little text and many (product) images, you can showcase what this Amazon Brand Store has to offer.
Product Grid (Product Grid)
This template displays selected products in a grid view. Therefore, this template is suitable for subpages where customers can choose which product they want to purchase.
Good to know: You do not necessarily have to rely on one of the three templates. Instead, you can also choose the “Blank” template and design your store from scratch.
Building the Amazon Brand Store: Adding Products
Once the structure of the pages has been established and you have chosen a page template, you can fill the new Amazon shop with content.
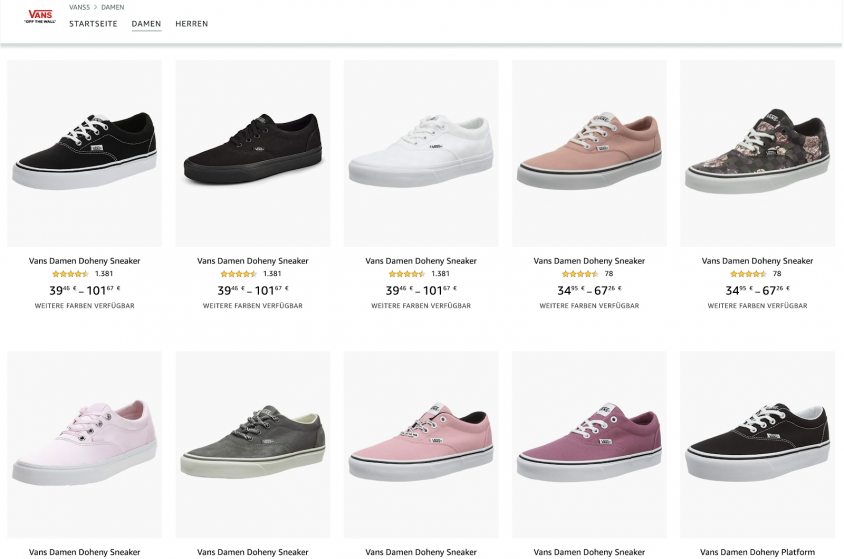
For this, so-called tiles are used. These determine the size of the displayed content. A tile can either fill the entire width of the page or only a small part, for example, a quarter. To illustrate this, take another look at the examples above. The header of Avent or ONLINE takes up the full width of the page, while the shoes from Vans only occupy one-fifth each.
The tiles in your Brand Store can be filled with different content depending on their size. In addition to media formats such as images or videos, you can also insert product grids. Information such as product name, image, Prime logo, and star rating are displayed. When customers click on one of the offers, they are directed to a dedicated product detail page.
You can easily add products using the search function via ASIN or keywords. Even lists of up to 500 ASINs can be used to add products.
Bestsellers, Recommended Products, and Deals
You can also use a bestseller tile to automatically display five products at the same time that are the best-selling and associated with your brand. You also have the option to use a tile for recommended products. This way, buyers are shown additional products from your portfolio that they might also be interested in based on their purchase history. For both types of tiles, they can only be used if your offering includes bestsellers or recommended products.
When you offer special deals to your customers, you can also represent that in your Brand Store on Amazon. To do this, select up to four products per row in the corresponding tile that you want to display there – the fewer products you show, the better you can highlight the corresponding offer. The tiles for recommended deals are only offered for the duration of the promotion and are automatically deactivated once the period has expired. Please note that Amazon only displays time-based deals such as “Deal of the Day” or “Best Deal” here; coupon promotions are excluded from this.
Summary: How do I create an Amazon Brand Store?
Creating a Brand Store is incredibly simple. You don’t even need a designer on your team. You just need to have professional product photos and sales texts ready.
Amazon Brand Store – Guidelines: What to consider
Once you have created your Brand Store on Amazon, it will be checked within 72 hours. During this time, the online giant will verify whether you have adhered to the guidelines for store displays as well as the general guidelines of the e-commerce giant.
Listing all Amazon guidelines for Brand Stores would exceed the scope of this blog article, but we would still like to provide you with the most important ones.
First of all, each page must contain at least one additional tile next to the header. The maximum number of 20 sections must not be exceeded. Also, some tile types may only be used in limited quantities:
Basic tiles are available in four sizes. It should be noted that some content can only be displayed in certain sizes. For example, a product grid can only be displayed in the largest size “Full Width,” while images are available in all sizes.
If you want to use media content such as images and videos for your Brand Store on Amazon, these must also meet certain minimum requirements. Images should have a minimum size of 750 x 750 pixels, and videos must be at least 450 x 320 pixels. The larger the corresponding media content is to be displayed, the higher the resolution must be.
You can find additional requirements for your Brand Store on Amazon on the help pages.
Tips for Your Amazon Brand Store: Best Practices
With Brand Stores, you have the opportunity to expand your branding and convey your brand message to the outside world. Therefore, you should also maintain a consistent line here. Choose colors, images, and videos that match your brand and, of course, each other.
In general, it is advisable to deliberately use visual stimuli when setting up your Amazon Brand Store, as these are more effective in attracting potential customers and drawing attention quickly. Ensure that the images are meaningful and support your message. If you are selling a wellness product, for example, images that convey relaxation are appropriate.
Especially for your header image, you should aim for the perfect picture, as it is the first thing customers see from your Amazon shop. It should present your brand image well and include your logo.
Speaking of images: Ensure high quality and have them taken by a professional photographer – blurry, unclear images appear extremely unprofessional and certainly do not inspire trust in the quality of your goods.
Of course, no Brand Store on Amazon is complete without text. These should be as concise and meaningful as possible. It is best to focus on the key points, as readability is the priority here.
Since an Amazon Brand Store can be found through Google, you should also pay attention to the correct use of keywords when creating the texts. This can increase visibility on Google and thus the visits to your shop. This, in turn, boosts your sales figures.
Conclusion: This is how branding works on Amazon
In short: A dedicated Amazon Brand Store provides you with extensive branding opportunities within the marketplace environment. Each store has its own URL, allowing you to also run advertising outside of Amazon.
With the templates and the simple tile system, you don’t need to be a designer to build a professional Amazon Brand Store. Certainly, such a store is not created in two minutes, but the effort is compensated by the fact that no competing products are offered or advertised in your store. Additionally, you can fill your store with your own colors and images and tell your own story. This strengthens your customers’ awareness of your brand, significantly increases the likelihood that customers will buy from you again, and enhances customer loyalty.
Frequently Asked Questions
With a Brand Store, Amazon sellers can open their own store on Amazon that looks almost like a standalone online shop. Nevertheless, orders are processed through Amazon. Such a Brand Store receives its own URL from Amazon, allowing advertising to be directed to it. This way, sellers can showcase their brand and present the associated products away from the competition.
First, the brand must be registered in the Amazon Brand Registry. After that, sellers can create the store in Seller Central. Various templates are available, which can then be individually customized using drag & drop. Finally, there is a review by Amazon before the store goes online.
To open an Amazon shop, interested parties must have a seller account and already offer products on Amazon. Additionally, the brand must be registered in the Amazon Brand Registry. After that, the Amazon shop can be created in Seller Central and stocked with items.
Image credits in the order of the images: © stock.adobe.com – Ruth / Screenshots @ Amazon


